Để thay đổi DNS trên Windows 10, các bước thực hiện như sau:
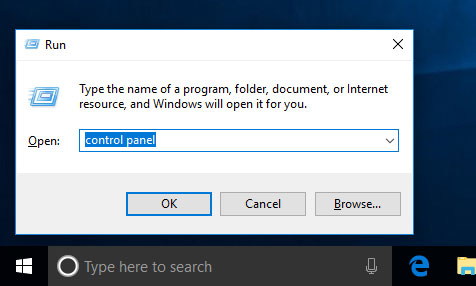
Bước 1. Mở Control Panel
Bạn đã biết có nhiều cách để mở Control Panel, dưới đây là cách dùng lệnh Run đơn giản.
1. Nhấn tổ hợp phím Ctrl_R
2. Gõ control panel
3. Nhấn phím Enter hoặc nhấp OK
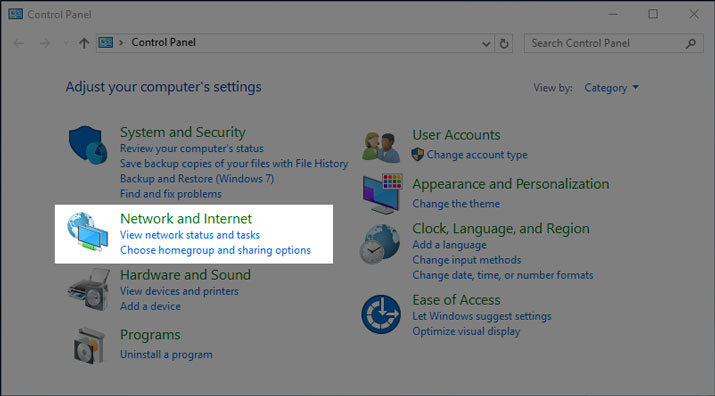
Bước 2. [Control Panel] Nhấp View network status and tasks
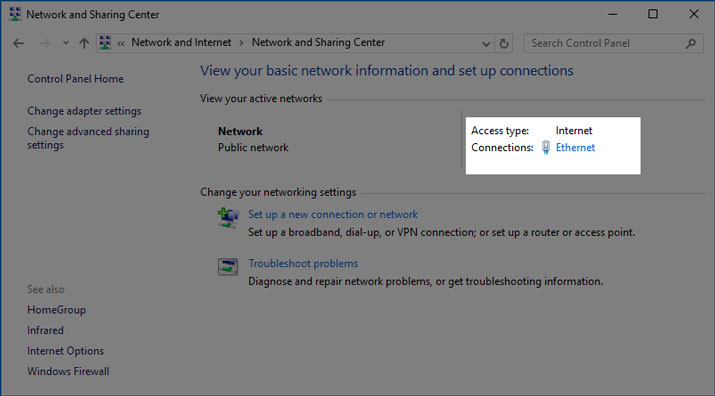
Bước 3. [Network and Sharing Center] Nhấp Ethernet
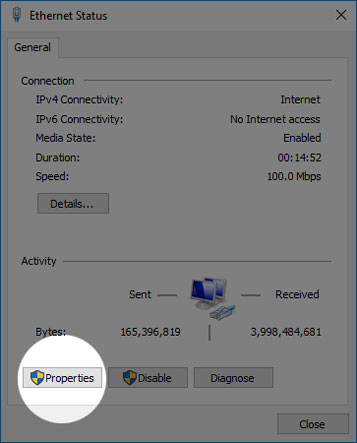
Bước 4. [Ethernet Status] Nhấp Properties
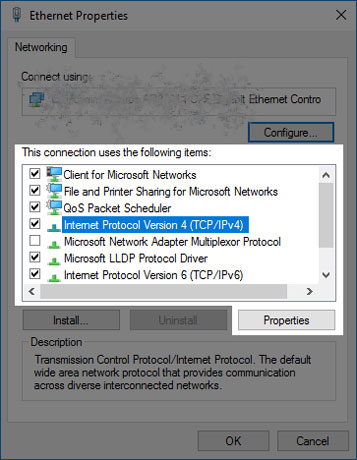
Bước 5. [Ethernet Properties]
1. Chọn (hoặc nhấp đúp chuột) Internet Protocol Version 4 (TCP/IPv4)
2. Nhấp Propertices
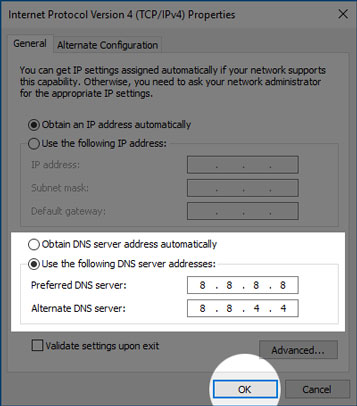
Bước 6. [Internet Protocol Version 4 (TCP/IPv4) Properties]
1. Chọn Use the following DNS server addresses
2. Nhập địa chỉ DNS mới. Ta có thể dùng thử 1 trong 2 dịch vụ miễn phí sau:
- Google:
- Preferred DNS server: 8.8.8.8
- Alternate DNS server: 8.8.4.4
- OpenDNS:
- Preferred DNS server: 208.67.222.222
- Alternate DNS server: 208.67.220.220
3. Nhấp OK